Printed meaning. | by Dyslexic.frogs | Oct, 2025
This project documents my first experience with screen printing. from concept to final prints. I explored two personal designs: one of a beetle, symbolizing peace and zen, and another of a close friend who has always inspired me to create art. My goal was to make designs that felt personally meaningful while sending out a positive message to others.
My Design Ideas
I started this project by brainstorming images that represented balance and creativity in my life.
The beetle design represents peace, zen, and grounding energy. I wanted it to feel calm yet strong, like a reminder to slow down and stay centered. With lots of lines
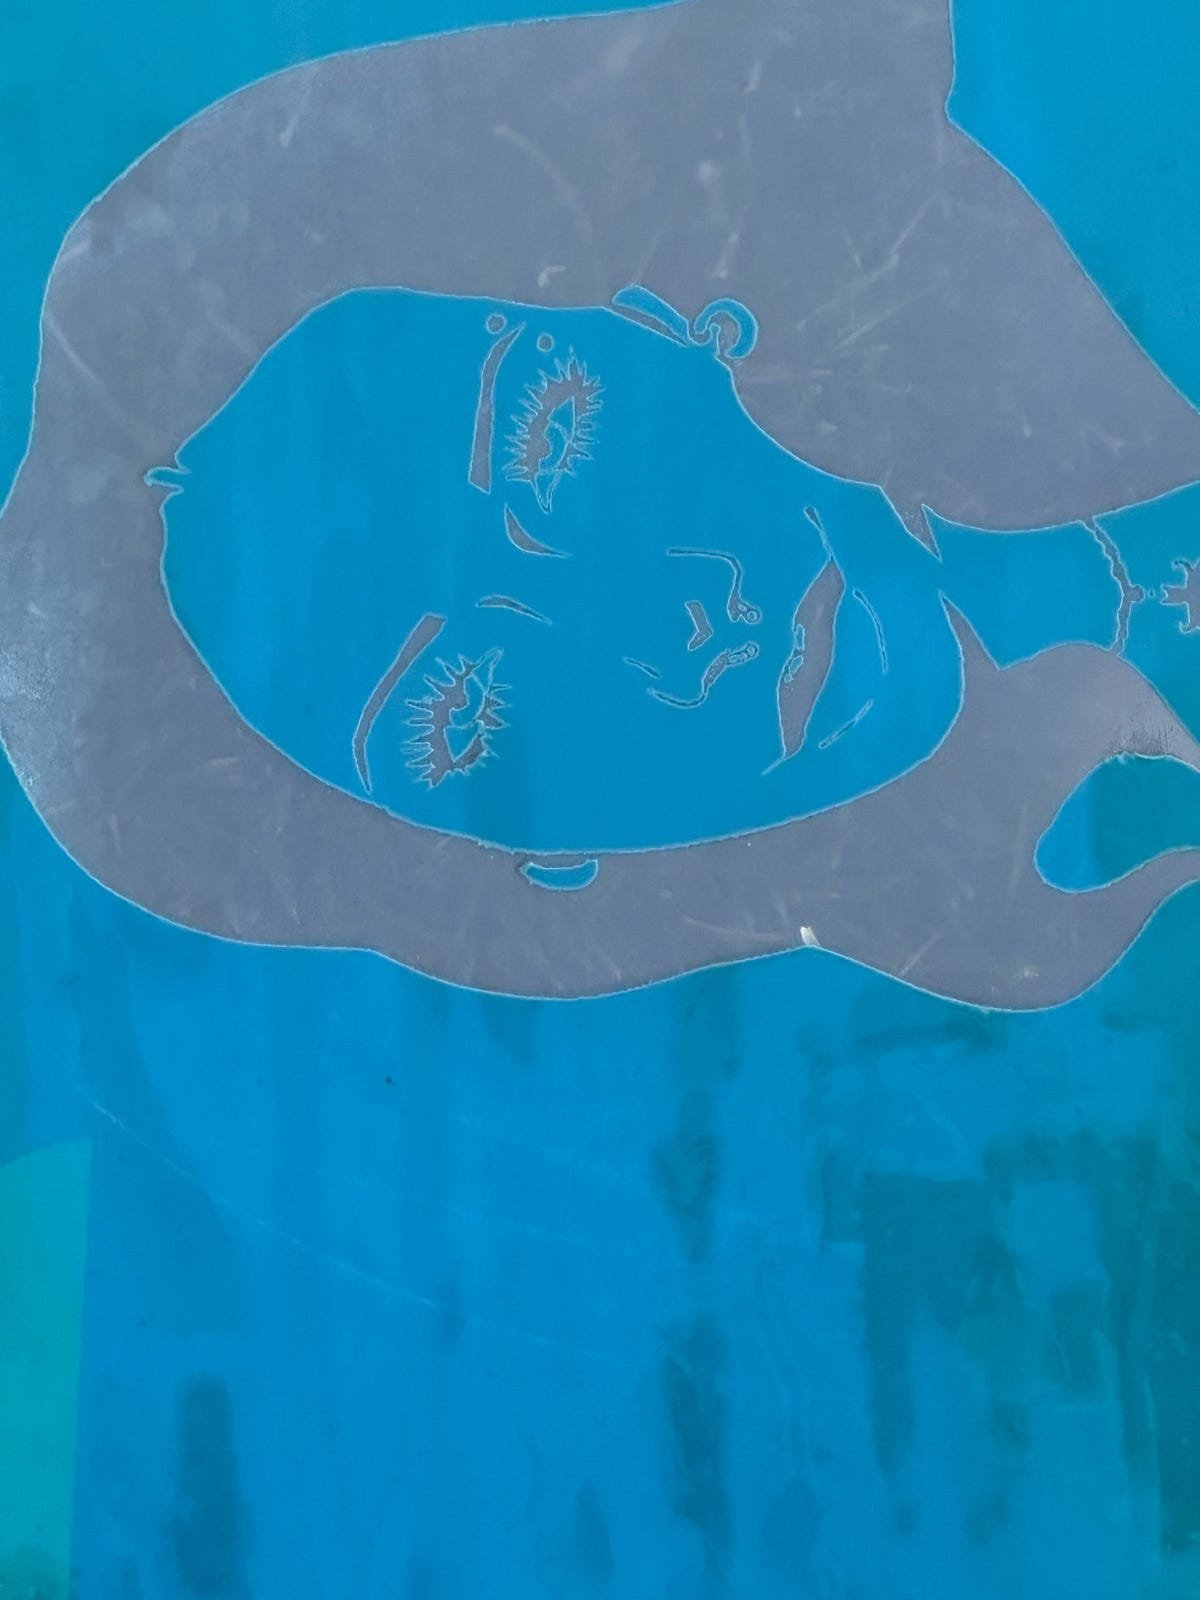
The portrait design is based on a friend who inspires me. She’s someone who has always supported my art and creativity, so I wanted to honor that through my work.
Both designs were created to express positivity — one inwardly (peace within myself) and one outwardly (appreciation toward others).
Caption: Early sketches from my iPad exploring the shapes and ideas behind each design.
Screen Printing Process
Screen printing was completely new to me, so I documented every step to learn and improve.
Steps I followed:
Drew and finalized both designs in my ipad. Then printed it on transparency paper
Prepared my screen by coating it with emulsion and letting it dry.
Exposed the screen using a light source to transfer the design.
Washed out the stencil area carefully to reveal the image.
Mixed my inks and started test prints to find the right texture and color.
Printed final versions on paper, adjusting pressure and alignment as needed.
Cleaned my screen and workspace thoroughly for reuse
Caption: Testing ink flow and making sure each layer prints cleanly.
Materials & Budget
Step
Description
Hours
Cost
Design & Sketching
Creating the beetle and portrait designs
3 hrs
$0
Screen Prep
Coating, exposing, washing
2 hrs
$10 (ink and emulsion)
Printing
Testing, experimenting, and final prints
3 hrs
$15 (paper and extra ink)
Cleanup & Documentation
Washing screens and photographing work
1 hr
$0
Screen Printing Kit
Complete starter set used for this project
—
$100
Total
9 hrs
$125
(Image: Materials laid out before printing)
Caption: My $100 starter kit and basic materials I used for this project.
Successes & Challenges
At first, my prints were uneven — too much ink or pressure. But after a few tries, I got the feel for it. My best success was capturing fine lines in both designs, and my biggest lesson was that screen printing takes patience and consistency.
Learning curve
Final Results
Both final designs turned out meaningful in their own way. The beetle feels peaceful and balanced, while the portrait captures the energy and creativity of my friend who inspired me.
Final Reflection
This project taught me that screen printing is both technical and emotional. You have to be precise with timing and materials, but also open to mistakes and happy accidents. My biggest success was capturing the details of both designs and experimenting with color. My biggest challenge was getting a clean, even print every time — but practice helped a lot. Investing in my own $100 screen printing kit was totally worth it because now I can keep creating prints on my own time.
Creating the beetle and portrait designs helped me connect to both my inner peace and the people who inspire me. The beetle symbolizes calm and balance to me, while the portrait of my friend celebrates the creativity and motivation she brings into my life.
All photos, designs, and prints created by me as part of my personal art project.
Screen right after burning + washing.